Gone Gardenin’: Moulds are hyper-enjoyable
Advertisement
Read this article for free:
or
Already have an account? Log in here »
We need your support!
Local journalism needs your support!
As we navigate through unprecedented times, our journalists are working harder than ever to bring you the latest local updates to keep you safe and informed.
Now, more than ever, we need your support.
Starting at $15.99 plus taxes every four weeks you can access your Brandon Sun online and full access to all content as it appears on our website.
Subscribe Nowor call circulation directly at (204) 727-0527.
Your pledge helps to ensure we provide the news that matters most to your community!
To continue reading, please subscribe:
Add Brandon Sun access to your Free Press subscription for only an additional
$1 for the first 4 weeks*
*Your next subscription payment will increase by $1.00 and you will be charged $20.00 plus GST for four weeks. After four weeks, your payment will increase to $24.00 plus GST every four weeks.
Read unlimited articles for free today:
or
Already have an account? Log in here »
Hey there, time traveller!
This article was published 16/03/2017 (3134 days ago), so information in it may no longer be current.
Every summer we try to attend the open gardens event in Birtle, a town close to our hearts as we lived in this wonderful community for more than 20 years. The very active garden club in Birtle operates a business called The Classic Garden with a Main Street location called “The Center” in which workshops are offered and garden objects such as cedar obelisks are manufactured.
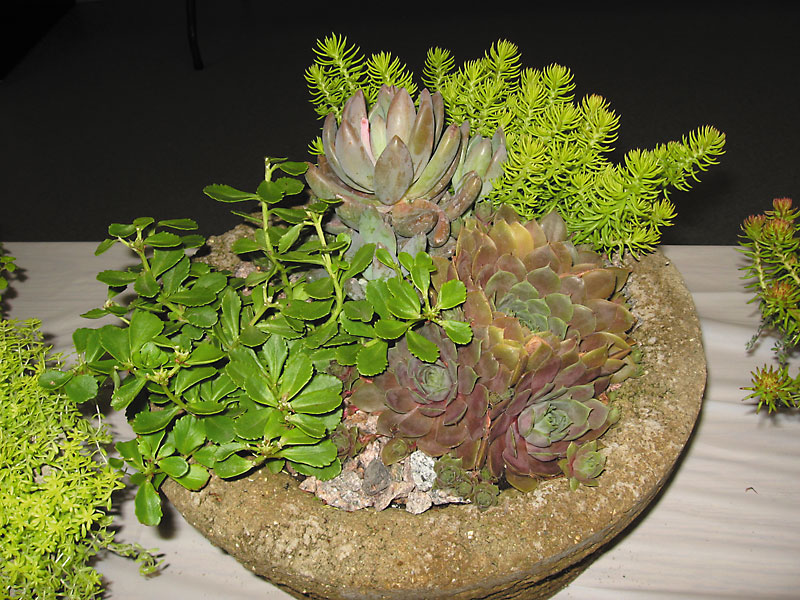
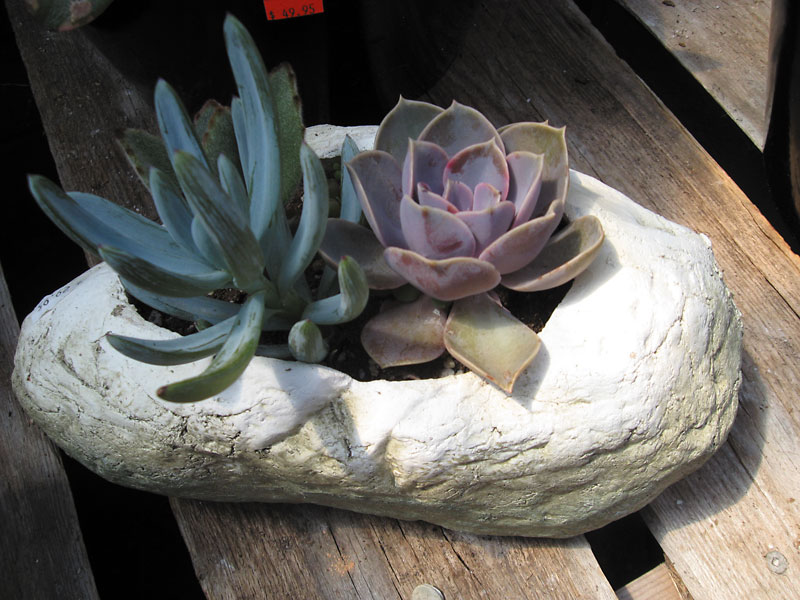
The event was pretty much rained out this summer, but we did drive to Birtle to tour and I came away with a renewed interest in hypertufa containers. Although I had seen hypertufa containers before — and actually made one at a workshop years ago — the ones that caught my eye had been made with rose bowls as the moulds.
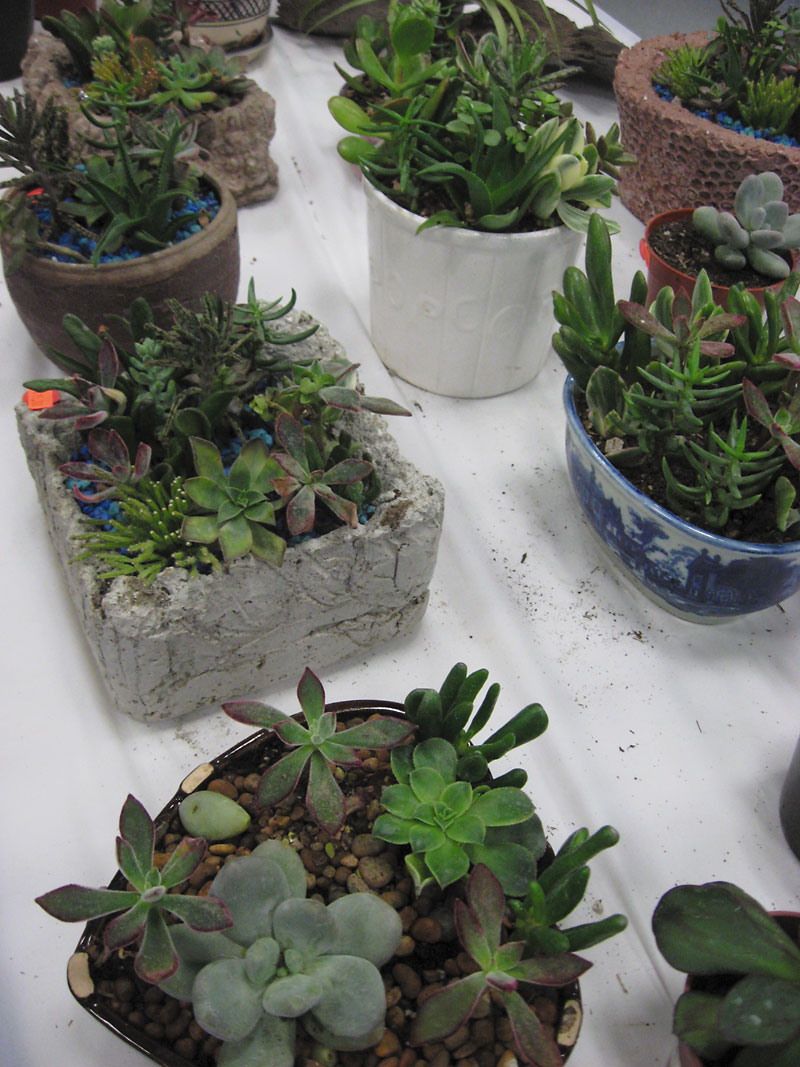
These delightful little containers were the perfect size in which to plant a succulent and several planted containers were on display. Of course, other small plants could be used instead.
At this time of year, as we get serious about planning our outdoor gardens, making some hypertufa containers for your garden might be just the distraction you need. You will then have some wonderful containers to use in your outdoor garden.
Hypertufa is a lightweight material made from Portland cement, sphagnum moss and perlite. Some people recommend equal proportions of the three ingredients, while others vary the recipe using two parts Portland cement, three parts moss and three parts perlite; others use three parts Portland cement, three parts perlite, and two parts moss.
The three ingredients are mixed thoroughly in a metal or plastic tub and then water is added gradually and mixed in until the hypertufa mix is the consistency of cottage cheese. You want the mixture moist enough to hold together when pressed into the mould but not so wet that it won’t hold its shape while it dries.
The mould will dictate the shape of the hypertufa container; some possible moulds are shoeboxes, plastic tubs, plastic flower pots, baskets, and glass containers (the glass will be broken during the process). Liquid cement colour can be used; containers made without adding colourant will have a more natural appearance that resembles stone.
Line the mould with plastic (except for glass moulds such as rose bowls) and then press the mixture firmly into the interior of the mould, keeping it three to four centimeters thick — larger containers should be thicker to make them more sturdy. Although the interior of the container will be hidden by soil, try to make the inside as uniform as possible.
The material will remain workable for at least half an hour so work carefully, and when you are have finished pressing the material into the mould and have the top edge smooth, enclose the entire thing inside a plastic bag and seal it. Leave it for a day and then carefully unmould it — the plastic should pull off easily. If you have used a glass mould, such as a rose bowl, you will break the glass to remove it.
Handle the container gently at this stage as it is still quite fragile if it seems too fragile to handle, put it back in the mould and wait for another day or so. The longer this initial curing period is, however, the less able you are to manipulate the texture of the exterior of the container.
Texture can be added to the outside of the container using a wire brush. You can even use a screw driver or knife to cut shallow lines to mimic cracks, or you can draw a specific design on the surface of the container — the plastic will have added some texture already.
At this time you might like to drill some drainage holes into the bottom of the container, although you can do this after the container has completely cured, using an electric drill. After you are happy with the texture and have shaved off any bits that detracted from the overall appearance of the container, enclose it in plastic and set it aside to cure for a couple of weeks. The plastic simply keeps the moisture levels high which results in a stronger container.
Get ready to display some of your plants in unique personalized hypertufa containers this summer by creating your very own containers. What a great garden project for late winter.
If you are a bit unsure if you want to undertake such a project on your own, watch for a workshop to attend; often garden clubs hold hypertufa workshops in the spring. If you are anywhere near Birtle, drop in to The Classic Garden’s The Center and get some ideas.
Albert Parsons lives, writes, and gardens in Minnedosa.
» wtw@brandonsun.com